Follow metrology best practices to maximize the precision of automated part measurements with a Q-Span Workstation
When making manual caliper measurements, the quality of your data depends on good metrology practices. The same is true when you automate measurement inspection using a Q-Span Workstation. Here are nine best practices to follow to optimize Q Span Workstation measurements.
OR CONTINUE READING BELOW

1. Factory Calibration, Certification and Re-Certification
Regularly re-certify your Q-Span System’s gripper/calipers to ensure conformance with your in-house quality management procedures.
The robotic gripper/calipers in a Q-Span Workstation are factory tested, calibrated and certified to achieve a repeatability of ±5 µm (six sigma) and full-scale accuracy of ±15 µm (six sigma). These results use pristine parts (NIST-traceable gage blocks and rings) and should be considered the “ideal case” results.
As with all metrology tools, the Q-Span System’s gripper/calipers should be regularly recertified in conformance with your in-house quality management procedures.
2. Part Characteristics
Consider intrinsic part variation when evaluating measurement methods and data.
Q-Span System measurement precision is highly dependent on part Geometric Dimensions and Tolerancing (GD&T). Before starting, determine whether the part features being measured have sufficient roundness, flatness, parallelism and surface finish to support “ideal case” repeatability. For example, a part feature with 25 µm flatness and parallelism cannot be measured with 5 µm repeatability.
In addition, all parts must be sufficiently clean and free of contamination that will change measurements.
3. Metrology Fingertip Shape and Cleaning
Follow long-established metrology practices to select the appropriate fingertips for each contact measurement, and practice regular cleaning procedures.
Q-Span System robotic gripper/calipers measure part features by touch (contact measurement). Standard metrology practices match the shape of each part feature with the appropriate fingertip shapes for measurement. The table below provides a few examples.
The NSR-Set-F2, Metrology Fingertips Set, included with the Q-Span Workstation Kit, provides a good starting point for many feature measurements.
The fingertips’ contact surfaces must be cleaned regularly to ensure that there is no contamination from production parts.
| Part Feature Shape |
First Fingertip Shape | Second Fingertip Shape |
| Sphere | Flat | Flat |
| Cylinder – Outside Diameter | Flat | Flat |
| Cylinder – Inside Diameter | Sphere -or- Cylinder | Sphere -or- Cylinder |
| Cylinder – Wall Thickness | Sphere -or- Cylinder | Flat |
| Flat and Parallel | Flat | Flat -or- Sphere |
4. Robot Dynamics / Smooth Motion
Verify that robot movement is not adding measurement error.
To achieve best precision, the part must be measured without robot motion. A minimum Wait Time is needed in the robot program to allow all dynamic motion to settle before taking the measurement.
Smoother robot motion reduces Wait Time and is optimized using robot control features including:
- Setting tool center points (TCPs) for each gripper
- Adding sufficient Way Points
- Making the best use of JMoves and LMoves.
See the Q-Span System user guide (registration required) for more information about these features.
A good starting point for Wait Time is 0.5 seconds. This may be reduced based on actual measurement results.
The Q-Span Workstation Kit includes robot programs that follow these practices.
5. Mechanical or Gravity Interference
Make sure there are no external mechanical interferences or gravity forces that twist the part.
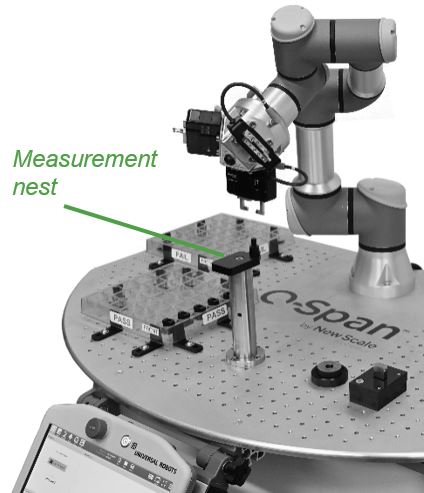
Q-Span System robotic gripper/calipers must measure the part feature without external mechanical interference. We recommend using the gripper to place the part in a measurement fixture (measurement nest) to establish a repeatable location and orientation for making measurements.
For very small parts, the gripper/caliper can pick up and hold the part in free state as long as gravity does not put a torque on the fingertips. For larger or asymmetric parts, we recommend that the measurement nest have a flat, low-friction surface where the part can “float” in a horizontal plane and align to the gripper/caliper centerline. The part is not picked up while being measured. In this case, a “double touch” is recommended to first center the part, and then make the measurement.
The Q-Span Workstation Kit includes a measurement nest and robot programs that follow these practices.
6. Measurement Force
Use the lowest gripping force available while still achieving sufficient repeatability.
The most accurate measurements are made with the lowest force. For most parts we recommend using a force of 3 N with the Q-Span System gripper/caliper.
7. Multiple Measurements
Use automated movements of the robot and gripper/calipers to make multiple measurements of the same feature, store the results, and calculate final measurements.
Some part features require multiple measurements to accommodate part GD&T. For example, cylindrical features with an inside or outside diameter may have non-roundness variations. In this case, the average diameter can be established by taking multiple measurements at different clocking angles.
A similar approach may be needed for non-flat and non-parallel features by recording the average of multiple measurements.
A special case is measuring inside diameters when the most accurate measurement requires that the two contact points are on the centerline. Contact us for more information.
8. Zero Reference
Embed a zero-reference process into your Q-Span System program.
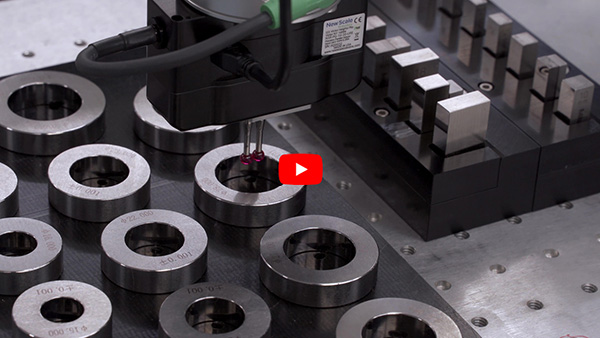
Each set of fingertips will have a unique zero reference (or offset) after they are installed on a robotic gripper/caliper. This reference must be set by measuring a calibration “artifact” with known dimensions, and ideally same feature shape as the part being measured.
Typical calibration artifacts include NIST-traceable gage blocks for outside measurements, NST-traceable gage rings for inside measurements, and certified master parts that match the production parts.
Program your Q-Span System to complete the zero-reference procedure automatically, and as frequently as required by your quality procedures. The Q-Span Workstation Kit includes robot programs that follow these practices.
9. Data Logging of Measurements
Make use of the automated data logging capabilities of the Q-Span System.
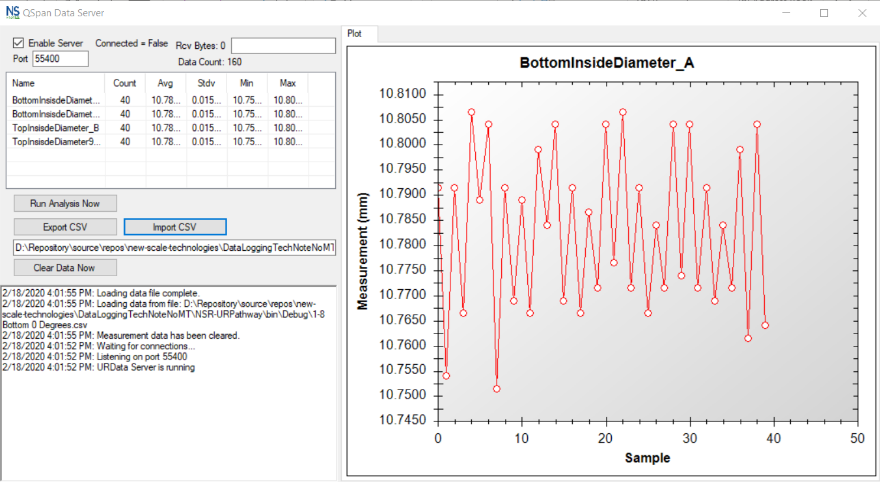
Each measurement should be logged into your Quality Management System. With a Q-Span System, measurement data is sent via ethernet using commands inside the robot program.
The available data includes metric or SAE units, date and time, and zero reference values. The data format options include .CSV files and unique formats for commercial QMS software programs.
Real-time data logging also support supports “Part 11” data integrity requirements that may be required by your QMS.
Summary
By following good metrology practices with your Q-Span System, you can achieve higher measurement precision than with manual caliper measurements and achieve your Gage R&R targets when automating small-part QC measurements.


